Monday, June 23, 2008

A Girl's Best Friend Wallet Pattern

Wallet Closed
This is the first wallet I made and it is from the pattern "A Girl's Best Friend Wallet" by Jenna Lou Sewing Patterns. The fabric is Freespirit's Barefoot Roses.
Pattern Notes:
  • I cut the seam allowance out of the interfacing. I think it would have been difficult to sew otherwise since it requires pellon craft fuse.
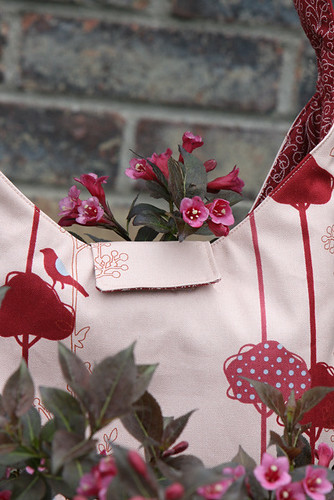
  • The inside of the zipper pocket is the backside of another piece of fabric. I think it would have been nice if it were the right side. The zipper pocket forms a pocket behind the whole thing as you can see in the below photo where the piece of pink paper is.
  • I sewed a button on the velcro strap before topstitching around it... that caused great difficulty when the button was in the way of the presser foot during top stitching. I finally figured out a way around it and got it stitched.
  • I had to seam rip a little bit larger opening to turn the whole wallet right side out after sewing the wallet outside and inside together.
  • I cut the card pockets an extra 1/4" taller so i could fold down the seam and then fold it over again to enclose the raw edges. I thought it would help keep down the unraveling from pulling credit cards in and out of the pocket.
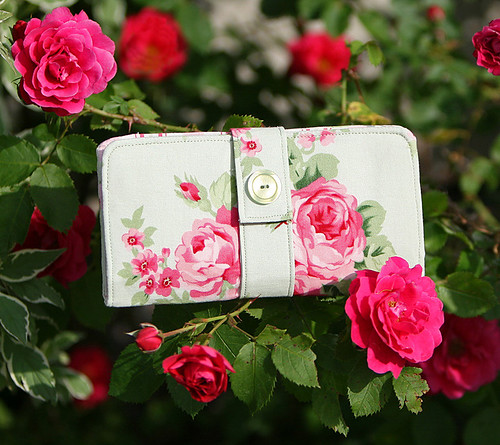
  • I planned my layout in terms of the finished product. I placed pattern pieces on the best spots in the fabric so that it would look the nicest when it was sewn up. For example, I placed the inside pieces on small flowers and i centered the outside piece on a large rose set. I also cut the striped pieces all in a line so the stripes would match up when completed.
Here's what the inside looks like:
Wallet Open
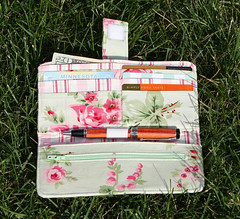
(Click to see larger)
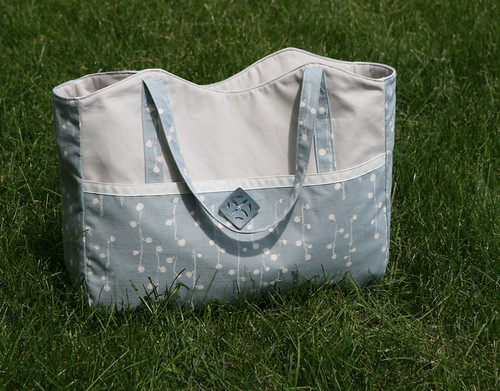
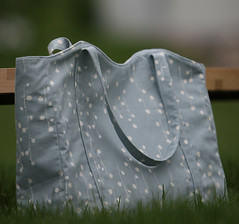
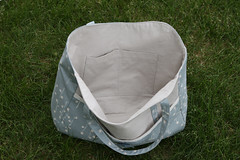
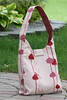
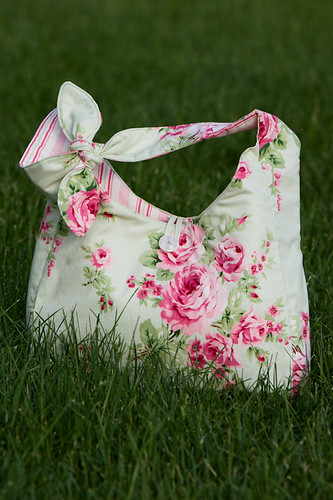
This wallet was made to match a bag previously blogged about.
Grand Revival Flea Market Bag

Sunday, June 15, 2008

Eco Market Tote

Eco Market Tote - Front
I just finished making the Eco Market Tote (pattern by Favorite Things) for our friend Cyndi. I chose a lovely Japanese linen for the outside and some neutral heavier cotton (maybe a twill?) for the lining and front contrast.
My thoughts on the pattern were that I found the directions to be a little too vague-- They just weren't clear enough to me when referencing the different pieces of the bag. I eventually sorted it all out though. I also found that when stitching in the bag side, I came up short where the top of the side met the top of the front and back bag pieces. I would cut that side piece out a little longer in the future since I can always trim off extra. I don't know if this was a problem with the pattern with the fabric stretching.
I did make some alterations to the pattern to suit my needs:
  • The directions called for a small double pocket on the back, but I felt it would look so much nicer without that. Instead, I put the pocket on the INSIDE and made it wider and maybe a little taller. It's nice to be able to quickly find your cell phone and other small items w/o it being an eyesore.
  • I added ribbon to the top of the outside pocket on the front of the bag. I thought it gave it a little extra detail.
  • I did not put in a button hole, but instead sewed the button on for decoration as a "dummy".
  • I installed velcro to hold the outside pocket closed instead of using a buttonhole. However, I think I sewed it a little lower than I should have. If I did it again, I would put it about 5/8" down from the top of the pocket. The velcro strip was a little over 2" wide. I sewed the velcro to the pocket lining so the stitching would not show through the front of the pocket.
  • I was fortunate enough to have enough linen to cut the 51" straps as one full piece instead of 6 small pieces that would be sew together in groups of 3 to form the straps. Somehow I miscalculated and cut them 41" the first time and didn't know until i had one half of the strap sewn to the bag =O
  • I top stitched around the opening of the bag.
  • I lined the handles with some lighter interfacing and the rest of the bag with fusible fleece to give it structure (I cut the seam allowance out of the interfacing to reduce bulk; it looks so much nicer). I use the fusible fleece in my bags. On the other bags that I've made, where I use a lighter upholstery fabric and quilting cotton, the fleece is the perfect weight. On this bag, which is also much wider, it did seem a little heavy. I used a a heavier lining fabric on this bag too, so that is probably part of that bulk.
Other random notes...
I had never sewn with linen before. I found it to be a little fussy with my machine. It liked to shift on me causing my stitches to be a little crooked here and there.
Eco Market Tote - Back Eco Market Tote - custom pockets

Saturday, June 7, 2008

Flea Market Bag, Velcro Closure

Tab Close-up
I have made this bag once before with the button closure. My Aunt saw mine and asked if I could maker her one too. I've learned a lot since I made my last one -- I didn't even bleed this time! Hers also has a velcro closure. I hadn't done one of those before, but it turned out nicely.
Some of the lessons I applied to this version:
1- Cut the seam allowance out of the fusible fleece interfacing. This made the seams lay nice and flat as well as made the finishing SO much easier. Last time the finishing was a nightmare; I had to top stitch through two layers of interfacing as a result of the seams folded down.
2- Put a color match thread for the outside fabric on top of the machine, and a different color in the bobbin which matched the lining fabric. Looks so nice!
3- I did not put pockets on the outside of the bag this time. I think the exterior fabric looks best without pockets covering up. It has a more clean look. I put two big pockets on the inside though.
More shots of this bag:
Flea Market Bag with Velcro Closure (closed) Flea Market Bag with Velcro Closure (open)

Wednesday, June 4, 2008

Flea Market Bag w/ Petal Ties

Grand Revival Flea Market Bag
This bag is for my Mother In-Law, Trish. It's so pretty that it's almost sad to mail it out, but I know it will be well loved!
I've made this pattern two times previously, but never with petal ties. I think it went ok. They are very cute, but since the ends get sewn together for the first 5 inches or so, and the mouth of the bag is partially stitched before turning right side out, if things doesn't line up exact, you don't have much wiggle room. No one wants to sew a giant wrinkle in... I had a minor issue (where the top of the bag front meets the side strap), but i managed to finagle it so you wouldn't even know it! I'm not sure if the outside bag stretched some during stitching or if the fleece interfacing that is fused to the inside bag caused a slight variance. Either way, it's all ok now.
This was also the first time I've sewn a button on with my machine. It was a little iffy at first trying to figure out how it worked, but I got it and the button looks great. The only thing that bugged me was the needle would scratch the button as it moved from right to left, but that's hidden under the thread. I wonder if the needle would have been up higher and not have done that if I found a setting that told the machine I was using thick fabric. I guess I have a little bit more to learn about machine "buttoning"....in other words, more manual reading.
Another first was sewing with stripes. OOOH, that's something challenging, for sure. I didn't even think about it when I cut the pocket and then I was so irritated that the stripes didn't line up when attaching the pocket that I ripped it out and cut a whole new one so that it would line up perfectly.
On a bad note, I have my Grandmother's almost done...and I just noticed on the front of the bag there is a thread missing in one little spot which will probably cause a hole. I'm SO ticked off. I could learn how to use my machine's darning stitch, but then it's just a bigger blemish. Or, i could tear the whole thing apart and replace the whole bag front. =( I'm not sure what to do yet, I'm too ticked to deal with it right now.
If you want to make one: This bag is sewn from Grand Revival's Flea Market Bag pattern and the fabric is from Freespirit's Barefoot Roses collection.
Other Notes: I used Pellon's fusible fleece interfacing on this bag (the one with the little glue dots/bumps NOT the one with the shiny glue, as it's to stiff) and I cut the seam allowance out of it. If you don't cut the seam allowance out of this thicker interfacing, your bag won't look as nice and it will be a lot harder to sew the openings (the ones used to turn the bag right-side out) shut. I learned this the hard way. =( You will can see the difference in the photos of on my "work bag"  (untrimmed) versus the one I made for my Aunt (trimmed). Big difference. Here's a full shot of the "trimmed one"
Update:
Read about the matching wallet
Wallet Closed Wallet Open