Monday, December 29, 2008

Tools I Love: My Professional Ironing Board

View a large photo of it! ... I'm to embarrassed to post a picture of mine buried in fabric.... =)
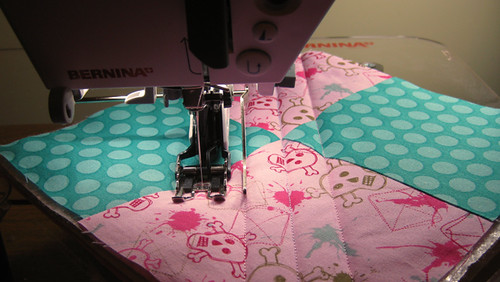
I thought I'd write about some of the sewing tools that I really love.  To first understand why I love it so much, you should know about the old tippy ironing board I had from target for many years.  The grooves where the legs slide through to put the legs up or down had a channel on the opposite side. To be more clear, as steam condensed under the ironing pad, it would drip into this channel and cause a pile of rust.  Since I always stick pins into the ironing board when doing things like ironing bias tape or pocket flaps, I just knew they were getting stuck through the pad to rust city. I don't know about you, but I'm not a fan of tetanus, and I hear seamstresses do get it. Some of us stab ourselves a lot during sewing projects....and it's not just a surface scratch!
Finally, I'd had enough. I decided to look for the biggest and best ironing board I could find...on amazon.com so I could get free shipping.  I settled on the Rowenta professional ironing board. This means my ironing board is wider (a lovely 18.5" wide!) than the average one you buy at Target or similar store. SO AWESOME. So much more ironing and project surface. I can never go back EVER!!!  It's 53" long not counting the iron rest on the end.
What else I love about it:
  • It has a cord holder that keeps my iron cord out of my way while I iron.
  • It has the metal hot iron holder with ?silicone? heat resistant thingies on it.
  • The iron holder has a little bar you can put hangers on....or hang your bias strips or press cloth...or whatever you want!
  • It has a treated metal surface that is supposed to resist rust.
  • The top of the leg tracks are flat so no more water and rust collector!  I checked under the pad first thing to see if this was designed better than my old board.
  • It's has a "laundry rack" underneath that I pile full of fabric.... =/
  • It has heavy duty legs so it's not tippy!!!  Amazon.com says it weighs 24.2 pounds if that gives you an idea.
  • It has a nice thick ironing cover/pad. It does shrink a little in the dryer though, so beware!

Sunday, December 28, 2008

Place Mats For Alice

Alice's Place Mats
I made these place mats for my Grandmother, Alice. I only have 3 done so far, but it seemed like a good time for a photo =)
I wrote in more detail about how they are made in my post about Peggy's Place Mats.  The only thing different about these is that they are not home dec weight cotton. To give them a little more body, I interfaced the back side of the top. So, in this photo, the pear fabric is interfaced with fusible lightweight interfacing.  I absolutely love these pears and they will go wonderfully in my Grandma's kitchen. Polka-dots are her favorite, so I used those for the back.   The pear fabric is by kokka and the dots are a from Moda's "It's Snowing" line.  I had originally purchased the dots for some holiday season bags, but it just went so well with the pears, that I had to order more.
Other things I did differently from Peggy's Place Mats:
  • I pinked  the top fabric's (the pears) seam allowance to reduce seam bulk which shows through more on lighter weight cotton.
  • I taped two pieces of template plastic together so that I'd have a big enough piece to cut a 19" x 15" rectangle (finished place mats are 18" x 14" with a 1/2" seam allowance). Not only was it easier to cut out the place mats with the template, but it allowed me to choose the most appealing section of the fabric to cut.  I wanted to make sure that I got two full rows of pears on each place mat so I aligned my see-through template on the fabric until I was happy, then I cut!
Update: My husband is my official place mat stuffer and he just reminded me that he finds place mats with interfaced cotton much harder to stuff than "un-interfaced" home dec weight ones.  The interfacing causes a lot more friction as you try and shove the peltex into the place mat. Something to keep in mind!

Monday, December 15, 2008

Turtle Coasters

Turtle Coasters
Not my best photo, but the winter isn't giving me much light to work with!
I just finished some little turtle coasters. My first coasters ever. It was hard to part with even the tiny squares of my turtle fabric. I just love that print. I don't know who makes it, but you can find it at several places that carry Japanese import fabrics.  I chose a plain patterned back side so that I could quilt meandering lines between the turtles on the front. If there were turtles on both sides, one side would have had quilting through the turtle's bodies and I didn't want that.
How I made them...
  1. I cut 4.5" squares out of my front and back fabrics.  (I made two sets of coasters, four coasters in each finished set. So I cut out 8 fronts and 8 backs.)
  2. I cut eight 4" squares of cotton batting that I had preshrunk. I also clipped the corners off of them so they would fit nice inside the coasters.
  3. I stitched around the coasters with a 1/4" seam allowance, leaving about a 3" opening in the middle of one of the sides. I then turned them right side out through the opening.
  4. I employed my husband to stuff the piece of batting into the coaster. =) =)  Then we pressed them flat with the iron. (If you read the post on Peggy's Place Mats, you will know that Ben is an expert place mat stuffer as well...)
  5. I folded the edges of the opening to the inside and stitched around the coasters (probably about 1/8" from the edge), closing up the open side in the process.
  6. Then, I sewed meandering lines between the turtles to quilt the coasters and hold the batting in place. I was careful not to stitch over border I already sewed in step #3 to keep them looking nice.
  7. That's it, they're ready to give to a good home!
*I bought my turtle fabric at crafty planet.

Friday, November 28, 2008

Peggy's Place Mats

Peggy's Place Mats
I just finished six place mats for my Aunt Peg. They are loosely based off the pattern in Amy Butler's In Stitches book. (Page 41). I used home dec weight cotton by Joel Dewberry from his Ginseng line.
What I did different from the pattern:
  1. I didn't put the 3" side panels down each side on the front. I chose to make the fronts a single fabric. I thought the panels, with this fabric, would make them look more modern and I wanted a traditional look to match their home.
  2. I altered the finished size to be 18" x 14".
  3. The pattern is for four mats, but I made six.
Frustrations:
  1. I hate hand sewing and I had to slip-stitch the seams together on the 8" opening that had been used to turn the place mats right side out. I stabbed myself in the finger and also managed to catch one stitch through a few threads of the jeans I was wearing. =/ So, basically, I sewed one to my pants...but I was trying to sew in a moving car (passenger seat).... Note to self: don't sew in the car! =)
  2. I had a heck of a time getting the Peltex to fit in the place mat.  The pattern says to cut the Peltex to the exact finished size of the place mat (that doesn't give you any wiggle room!) and leave an 8" opening to shove it through. However, the Peltex catches on everything due to the texture so it takes some work to get it in there. Plus, mine kept bowing because it was a hare too big. I'd take it out, trim it, try again. Repeat. I was about to go insane when my Husband took over. He came up with a great idea to set the Peltex on the cutting board, lay the place mat on top. Then, slip the cutting ruler between the two and line the ruler up under the place mat. Then he lifted off the place mat and roller cut the excess Peltex off. Perfect sizing! The Peltex began to fit inside in just one try!  He also clipped the corners off the Peltex (just a tiny bit) so they weren't competing with the seam allowance bunched into the turned points.
Other notes:
  1. I used my walking foot to help reduce stretch as I sewed them.
  2. Top stitching through the top, bottom, seam allowance, and Peltex, I found that the top stitches were perfect but the ones on the back side of the mat were crooked. I talked to Nancy at my Bernina Dealer and she had some great advice. She said I didn't do anything wrong. She explained how the needle looks for a space in the weave to push through. My needle obviously had some issues finding a spot on the bottom fabric, especially after going through Peltex as well. She said that when I'm not using fabric with linear patterns (i.e stripes or plaids where you'd notice they were a little crooked), to cut the back of the place mat slightly off-grain and I should not have that problem. She said it better, but that's the summary.
Overall, I'm really pleased with them and will be making 2 more sets (in different fabrics) as Christmas gifts.
Back Side:
Peggy's Place Mats  - Back Side

Sunday, November 2, 2008

Sara's Birthday Apron (and pot holders)

Amy Butler Apron
For my Sister's Birthday I thought I'd make an apron with matching hot pads. I chose some fun fabric to match her tough-girl personality. I used the apron and pot holder pattern from Amy Butler's book "In Stitches".  The apron features pleats, a pocket, and a towel loop.
Amy Butler Apron - Back Apron Back
What I did different than the book for the Apron:
  1. I placed the towel loop and the pocket on the left side of the apron because my sister is left handed.
  2. I cut the blue polka dot pocket flap/trim longer because I thought it looked better. I probably added an extra 3/4 inch.
  3. I cut the pocket out of pink fabric instead of the same fabric as the main apron panel.
  4. I don't know if this is necessarily different from the pattern, but I used color matched thread on the project. I even sewed the pocket to the apron using teal thread on the polka dot top half, and pink thread on the pink part of the pocket.
What I'd do different next time:
  1. I'd make the top trim of the fabric longer again. I liked the look.
  2. I'd interface the waistband.
  3. I might cut the point into apron ties (cut the ends at an angle) and sew them up. The pattern actually has you make square ends and then, after you've sewn them up and turned them right side, has you fold them into a point and slip-stitch. It's very odd. (However, I cheated and used steam-a-seam two sided seam tape to attach it instead of slip-stitching...)
Sara's Pot Holders
The pot holders feature a place to put your hands in the back side of the pot holder so you can fold it in half and grab hot pans!  You are seeing the back side of the bottom pot holder.  (Your thumb goes in the bottom "pocket" while the rest of your hand goes in the top "pocket" so you can fold the pot holder in half to grab things with.)
What I did different than the book for the Pot Holders:
  1. I used special "batting" called Insul-Bright that is made for pot holders. It has something in it that "reflects the heat back to the source" and "consists of hollow, polyester fibers needlepunched through Mylar". You can buy it in the interfacing section at Jo-Anns, or order it from their web site pre-packaged. I'm sure you can find it at other shops as well. I used two layers in the main square pot holder section and one layer in the hand flaps on the back. Also, this product says it can go in the washer and dryer.
  2. Since I stuffed my pot holders with insul-bright, they were a little thicker than the pattern expected. When I stitched the bias binding to the back side, I needed to do less than the 1/2" seam allowance so that it would fold over with enough on the front side.
  3. I used the dual-feed foot (also called a walking foot) on my machine to quilt the pot holders as well as sew the bias on. I LOVE THAT FOOT. It made such a big difference in how nice they turned out. If you have one of these feet, you really should use it. For those who don't know what it is, it's a special foot that feeds on the top while your feed dogs move the bottom. It's good for thick fabrics (and stretchy ones) as it helps the top layer and bottom layer move through the machine at the same pace.
  4. My dual-feed foot (as well as some machine's standard foot) comes with seam guides. This was awesome as I did not have to do the masking tape method to quilt the diagonal lines evenly apart. Here is a photo of what I'm talking about. I had to draw a chalk line for the very first row, and then I could use the guide for all the rest.

Using Dual Feed Foot w/ Guide
Dual feed foot with guide attachment. Place the guide on the previous line of stitching to quilt evenly spaced rows.

Saturday, August 23, 2008

Mischievous Gnome Messenger Bag

Sarah's Messenger Bag
I recently completed a bag for my sister in-law, Sarah, from Sew Liberated's "Mischievous Gnome Messenger Bag" pattern.  It turned out beautifully and only required two band-aids for me....
This bag has a short pocket on the front and a tall one on the back.
Some changes I made to the pattern:
  • I sewed in velcro as the closure for the top flap and added a pull tab from the same ribbon that is used on the pocket edging.
  • Used ribbon on the pocket top edges instead of the fabric band included in the pattern.
  • I had to cut the patch bigger in order to fit the bird on it.
Tough Spots:
  • I had a hard time sewing the bottom corners. I had to do it twice because something got caught up in the stitching the first time. (It's a lot of layers).
  • I had problems with stretch while sewing. I think I will try my dual-feed foot next time.
  • Plan your layout carefully. You can see there is a bird near the top of the front pocket. That is my second pocket. I thought I had planned to not cut off the bird's head by leaving the seam allowance above it....forgetting about the ribbon I was going to put on. That fabric is $16 a yard -- NOT a good mistake! :)
Other shots, including inside pocket:
Sarah's Messenger Bag Sarah's Messenger Bag - Inside Pocket Sarah's Messenger Bag
About the fabric:
  • The inside swirly fabric is from The Haussmann 1800's Collection by Sharon Yenter for In The Beginning fabrics. It's color matched the echino nicely. I don't know what the blue is.
  • The pocket fabric is by Echino for Kokka fabrics.
  • The bag flap and body is a corduroy.  Source unknown.
  • The blue fabric on the inside pocket is also unknown.

Monday, June 23, 2008

A Girl's Best Friend Wallet Pattern

Wallet Closed
This is the first wallet I made and it is from the pattern "A Girl's Best Friend Wallet" by Jenna Lou Sewing Patterns. The fabric is Freespirit's Barefoot Roses.
Pattern Notes:
  • I cut the seam allowance out of the interfacing. I think it would have been difficult to sew otherwise since it requires pellon craft fuse.
  • The inside of the zipper pocket is the backside of another piece of fabric. I think it would have been nice if it were the right side. The zipper pocket forms a pocket behind the whole thing as you can see in the below photo where the piece of pink paper is.
  • I sewed a button on the velcro strap before topstitching around it... that caused great difficulty when the button was in the way of the presser foot during top stitching. I finally figured out a way around it and got it stitched.
  • I had to seam rip a little bit larger opening to turn the whole wallet right side out after sewing the wallet outside and inside together.
  • I cut the card pockets an extra 1/4" taller so i could fold down the seam and then fold it over again to enclose the raw edges. I thought it would help keep down the unraveling from pulling credit cards in and out of the pocket.
  • I planned my layout in terms of the finished product. I placed pattern pieces on the best spots in the fabric so that it would look the nicest when it was sewn up. For example, I placed the inside pieces on small flowers and i centered the outside piece on a large rose set. I also cut the striped pieces all in a line so the stripes would match up when completed.
Here's what the inside looks like:
Wallet Open
(Click to see larger)
This wallet was made to match a bag previously blogged about.
Grand Revival Flea Market Bag

Sunday, June 15, 2008

Eco Market Tote

Eco Market Tote - Front
I just finished making the Eco Market Tote (pattern by Favorite Things) for our friend Cyndi. I chose a lovely Japanese linen for the outside and some neutral heavier cotton (maybe a twill?) for the lining and front contrast.
My thoughts on the pattern were that I found the directions to be a little too vague-- They just weren't clear enough to me when referencing the different pieces of the bag. I eventually sorted it all out though. I also found that when stitching in the bag side, I came up short where the top of the side met the top of the front and back bag pieces. I would cut that side piece out a little longer in the future since I can always trim off extra. I don't know if this was a problem with the pattern with the fabric stretching.
I did make some alterations to the pattern to suit my needs:
  • The directions called for a small double pocket on the back, but I felt it would look so much nicer without that. Instead, I put the pocket on the INSIDE and made it wider and maybe a little taller. It's nice to be able to quickly find your cell phone and other small items w/o it being an eyesore.
  • I added ribbon to the top of the outside pocket on the front of the bag. I thought it gave it a little extra detail.
  • I did not put in a button hole, but instead sewed the button on for decoration as a "dummy".
  • I installed velcro to hold the outside pocket closed instead of using a buttonhole. However, I think I sewed it a little lower than I should have. If I did it again, I would put it about 5/8" down from the top of the pocket. The velcro strip was a little over 2" wide. I sewed the velcro to the pocket lining so the stitching would not show through the front of the pocket.
  • I was fortunate enough to have enough linen to cut the 51" straps as one full piece instead of 6 small pieces that would be sew together in groups of 3 to form the straps. Somehow I miscalculated and cut them 41" the first time and didn't know until i had one half of the strap sewn to the bag =O
  • I top stitched around the opening of the bag.
  • I lined the handles with some lighter interfacing and the rest of the bag with fusible fleece to give it structure (I cut the seam allowance out of the interfacing to reduce bulk; it looks so much nicer). I use the fusible fleece in my bags. On the other bags that I've made, where I use a lighter upholstery fabric and quilting cotton, the fleece is the perfect weight. On this bag, which is also much wider, it did seem a little heavy. I used a a heavier lining fabric on this bag too, so that is probably part of that bulk.
Other random notes...
I had never sewn with linen before. I found it to be a little fussy with my machine. It liked to shift on me causing my stitches to be a little crooked here and there.
Eco Market Tote - Back Eco Market Tote - custom pockets

Saturday, June 7, 2008

Flea Market Bag, Velcro Closure

Tab Close-up
I have made this bag once before with the button closure. My Aunt saw mine and asked if I could maker her one too. I've learned a lot since I made my last one -- I didn't even bleed this time! Hers also has a velcro closure. I hadn't done one of those before, but it turned out nicely.
Some of the lessons I applied to this version:
1- Cut the seam allowance out of the fusible fleece interfacing. This made the seams lay nice and flat as well as made the finishing SO much easier. Last time the finishing was a nightmare; I had to top stitch through two layers of interfacing as a result of the seams folded down.
2- Put a color match thread for the outside fabric on top of the machine, and a different color in the bobbin which matched the lining fabric. Looks so nice!
3- I did not put pockets on the outside of the bag this time. I think the exterior fabric looks best without pockets covering up. It has a more clean look. I put two big pockets on the inside though.
More shots of this bag:
Flea Market Bag with Velcro Closure (closed) Flea Market Bag with Velcro Closure (open)

Wednesday, June 4, 2008

Flea Market Bag w/ Petal Ties

Grand Revival Flea Market Bag
This bag is for my Mother In-Law, Trish. It's so pretty that it's almost sad to mail it out, but I know it will be well loved!
I've made this pattern two times previously, but never with petal ties. I think it went ok. They are very cute, but since the ends get sewn together for the first 5 inches or so, and the mouth of the bag is partially stitched before turning right side out, if things doesn't line up exact, you don't have much wiggle room. No one wants to sew a giant wrinkle in... I had a minor issue (where the top of the bag front meets the side strap), but i managed to finagle it so you wouldn't even know it! I'm not sure if the outside bag stretched some during stitching or if the fleece interfacing that is fused to the inside bag caused a slight variance. Either way, it's all ok now.
This was also the first time I've sewn a button on with my machine. It was a little iffy at first trying to figure out how it worked, but I got it and the button looks great. The only thing that bugged me was the needle would scratch the button as it moved from right to left, but that's hidden under the thread. I wonder if the needle would have been up higher and not have done that if I found a setting that told the machine I was using thick fabric. I guess I have a little bit more to learn about machine "buttoning"....in other words, more manual reading.
Another first was sewing with stripes. OOOH, that's something challenging, for sure. I didn't even think about it when I cut the pocket and then I was so irritated that the stripes didn't line up when attaching the pocket that I ripped it out and cut a whole new one so that it would line up perfectly.
On a bad note, I have my Grandmother's almost done...and I just noticed on the front of the bag there is a thread missing in one little spot which will probably cause a hole. I'm SO ticked off. I could learn how to use my machine's darning stitch, but then it's just a bigger blemish. Or, i could tear the whole thing apart and replace the whole bag front. =( I'm not sure what to do yet, I'm too ticked to deal with it right now.
If you want to make one: This bag is sewn from Grand Revival's Flea Market Bag pattern and the fabric is from Freespirit's Barefoot Roses collection.
Other Notes: I used Pellon's fusible fleece interfacing on this bag (the one with the little glue dots/bumps NOT the one with the shiny glue, as it's to stiff) and I cut the seam allowance out of it. If you don't cut the seam allowance out of this thicker interfacing, your bag won't look as nice and it will be a lot harder to sew the openings (the ones used to turn the bag right-side out) shut. I learned this the hard way. =( You will can see the difference in the photos of on my "work bag"  (untrimmed) versus the one I made for my Aunt (trimmed). Big difference. Here's a full shot of the "trimmed one"
Update:
Read about the matching wallet
Wallet Closed Wallet Open

Friday, May 23, 2008

Birthday Apron

For my Mother In-Law's Birthday I made here a lovely apron in a floral fabric she chose. It was Butterick B4945-- also known as the first pattern I ever threw out. The curved ruffle and curved side edging was a little  frustrating (I hate sewing curves!), but the worst was where the side ties join the apron and are supposed to be covered by the side edging. Whoever designed this pattern wasn't thinking when it came to this part. The side edging is supposed to hide where the tie joins in but it was not so on the bottom edges of the ties. Another issue (which is easily fixable) was that the waist ties were 10 miles long. They would drag on the floor for anyone shorter than a basketball player who was wearing it! I tripped on them once carrying the apron around the sewing room. Lastly, the apron involved hand slipstitching the side edging closed on the wrong side of the apron. Some people love hand sewing, but I love my sewing MACHINE.

My Grandma gave me great advice when she said if a pattern is bad, don't keep it -- throw it away!!

Other than the frustrations and the finishing issue, I think it turned out well. But in the future, I'm going to give the Emmeline Apron pattern a try!

Trish's Apron

*The light pink floral is from Freespirit's Barefoot Roses collection.

Sunday, April 6, 2008

Sock Monkey Bag

Sock Monkey Bag

For Mother's Day we gave our Mothers and Grandmothers a choice of an apron or this bag pattern. They all chose the bag. My Mother wanted the sock monkey fabric because she though it was so funny. It did turn out pretty cute. There is a monkey head button on the back that the loop goes over to close the bag.


I had a hard time with the corners on this bag. It didn't say to clip them but I think it helps in terms of easing the curve. I didn't know what kind of interfacing to use and I didn't see any guidance in the pattern instructions either. I ended up using some fusible fleece style that gives the bag a little more stiffness. It made it a little hard to sew when joining the inside and outside bags together though.


*This bag is made from Grand Revival's Flea Market Bag pattern. It is the size small shoulder bag version. The fabric is by Moda.


Sock Monkey Bag Button Closure on Sock Monkey Bag Sock Monkey Bag

Tuesday, April 1, 2008

Renaissance Dress


Renaissance Dress Decoration Close-Up
I sewed this dress from my Brother in-law's Renaissance Wedding last May. Since it was in early summer so I had to go with lightweight fabric and I chose not to line the sleeves as the pattern called for. Though it is not shown, this dress laces up the back.
I learned a lot from this project considering it was my second dress and the first time I had ever done sleeves. There is lining in the top half of the dress so I got the "pleasure" (sarcasm) of doing the sleeves twice! All and all it went pretty well. My biggest issue is that my hips are one pattern size larger than my bust. So that makes for complications. I'm also 5'4" so I had to shorten my pattern which was something I'd never done before either.
See the full dress here!
*Sewn from McCalls Costume Pattern #M4491 out of random fabric I found at Jo-Anns with crepe back satin for the sleeves.
Brother In-Law's Ren Wedding