
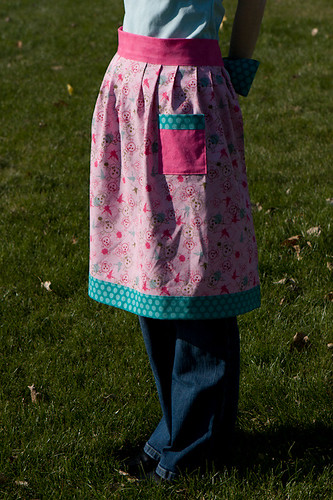
For my Sister's Birthday I thought I'd make an apron with matching hot pads. I chose some fun fabric to match her tough-girl personality. I used the apron and pot holder pattern from Amy Butler's book "In Stitches". The apron features pleats, a pocket, and a towel loop.
 Apron Back
What I did different than the book for the Apron:
- I placed the towel loop and the pocket on the left side of the apron because my sister is left handed.
- I cut the blue polka dot pocket flap/trim longer because I thought it looked better. I probably added an extra 3/4 inch.
- I cut the pocket out of pink fabric instead of the same fabric as the main apron panel.
- I don't know if this is necessarily different from the pattern, but I used color matched thread on the project. I even sewed the pocket to the apron using teal thread on the polka dot top half, and pink thread on the pink part of the pocket.
- I'd make the top trim of the fabric longer again. I liked the look.
- I'd interface the waistband.
- I might cut the point into apron ties (cut the ends at an angle) and sew them up. The pattern actually has you make square ends and then, after you've sewn them up and turned them right side, has you fold them into a point and slip-stitch. It's very odd. (However, I cheated and used steam-a-seam two sided seam tape to attach it instead of slip-stitching...)
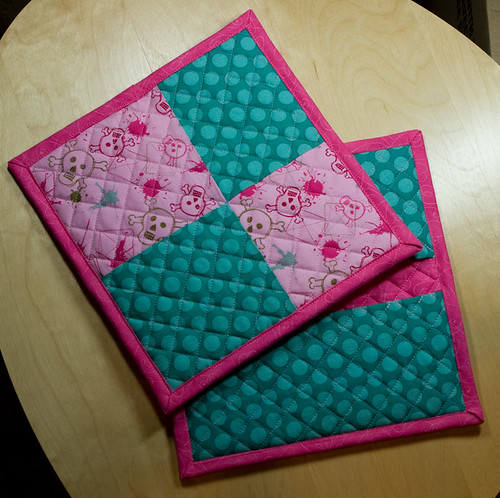
The pot holders feature a place to put your hands in the back side of the pot holder so you can fold it in half and grab hot pans! You are seeing the back side of the bottom pot holder. (Your thumb goes in the bottom "pocket" while the rest of your hand goes in the top "pocket" so you can fold the pot holder in half to grab things with.)
What I did different than the book for the Pot Holders:
- I used special "batting" called Insul-Bright that is made for pot holders. It has something in it that "reflects the heat back to the source" and "consists of hollow, polyester fibers needlepunched through Mylar". You can buy it in the interfacing section at Jo-Anns, or order it from their web site pre-packaged. I'm sure you can find it at other shops as well. I used two layers in the main square pot holder section and one layer in the hand flaps on the back. Also, this product says it can go in the washer and dryer.
- Since I stuffed my pot holders with insul-bright, they were a little thicker than the pattern expected. When I stitched the bias binding to the back side, I needed to do less than the 1/2" seam allowance so that it would fold over with enough on the front side.
- I used the dual-feed foot (also called a walking foot) on my machine to quilt the pot holders as well as sew the bias on. I LOVE THAT FOOT. It made such a big difference in how nice they turned out. If you have one of these feet, you really should use it. For those who don't know what it is, it's a special foot that feeds on the top while your feed dogs move the bottom. It's good for thick fabrics (and stretchy ones) as it helps the top layer and bottom layer move through the machine at the same pace.
- My dual-feed foot (as well as some machine's standard foot) comes with seam guides. This was awesome as I did not have to do the masking tape method to quilt the diagonal lines evenly apart. Here is a photo of what I'm talking about. I had to draw a chalk line for the very first row, and then I could use the guide for all the rest.
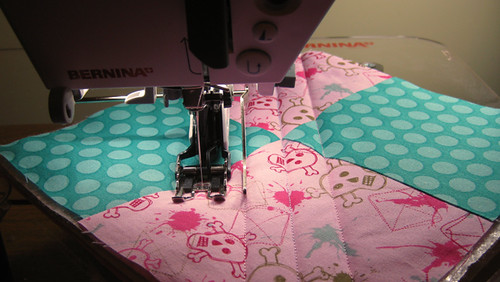
Dual feed foot with guide attachment. Place the guide on the previous line of stitching to quilt evenly spaced rows.

No comments:
Post a Comment
Thanks for sharing your thoughts!