Friday, November 28, 2008

Peggy's Place Mats

Peggy's Place Mats
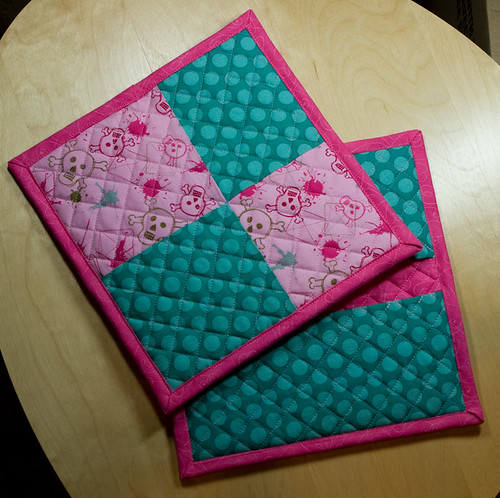
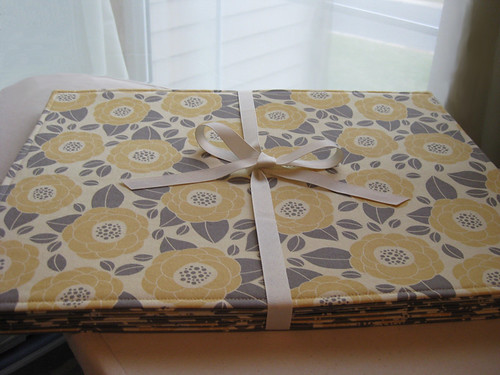
I just finished six place mats for my Aunt Peg. They are loosely based off the pattern in Amy Butler's In Stitches book. (Page 41). I used home dec weight cotton by Joel Dewberry from his Ginseng line.
What I did different from the pattern:
  1. I didn't put the 3" side panels down each side on the front. I chose to make the fronts a single fabric. I thought the panels, with this fabric, would make them look more modern and I wanted a traditional look to match their home.
  2. I altered the finished size to be 18" x 14".
  3. The pattern is for four mats, but I made six.
Frustrations:
  1. I hate hand sewing and I had to slip-stitch the seams together on the 8" opening that had been used to turn the place mats right side out. I stabbed myself in the finger and also managed to catch one stitch through a few threads of the jeans I was wearing. =/ So, basically, I sewed one to my pants...but I was trying to sew in a moving car (passenger seat).... Note to self: don't sew in the car! =)
  2. I had a heck of a time getting the Peltex to fit in the place mat.  The pattern says to cut the Peltex to the exact finished size of the place mat (that doesn't give you any wiggle room!) and leave an 8" opening to shove it through. However, the Peltex catches on everything due to the texture so it takes some work to get it in there. Plus, mine kept bowing because it was a hare too big. I'd take it out, trim it, try again. Repeat. I was about to go insane when my Husband took over. He came up with a great idea to set the Peltex on the cutting board, lay the place mat on top. Then, slip the cutting ruler between the two and line the ruler up under the place mat. Then he lifted off the place mat and roller cut the excess Peltex off. Perfect sizing! The Peltex began to fit inside in just one try!  He also clipped the corners off the Peltex (just a tiny bit) so they weren't competing with the seam allowance bunched into the turned points.
Other notes:
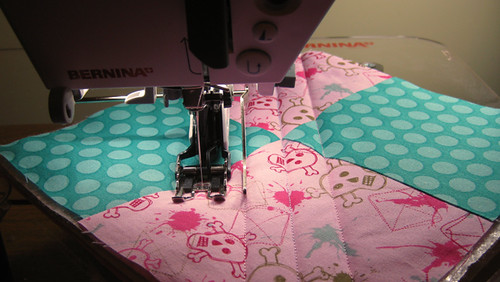
  1. I used my walking foot to help reduce stretch as I sewed them.
  2. Top stitching through the top, bottom, seam allowance, and Peltex, I found that the top stitches were perfect but the ones on the back side of the mat were crooked. I talked to Nancy at my Bernina Dealer and she had some great advice. She said I didn't do anything wrong. She explained how the needle looks for a space in the weave to push through. My needle obviously had some issues finding a spot on the bottom fabric, especially after going through Peltex as well. She said that when I'm not using fabric with linear patterns (i.e stripes or plaids where you'd notice they were a little crooked), to cut the back of the place mat slightly off-grain and I should not have that problem. She said it better, but that's the summary.
Overall, I'm really pleased with them and will be making 2 more sets (in different fabrics) as Christmas gifts.
Back Side:
Peggy's Place Mats  - Back Side

Sunday, November 2, 2008

Sara's Birthday Apron (and pot holders)

Amy Butler Apron
For my Sister's Birthday I thought I'd make an apron with matching hot pads. I chose some fun fabric to match her tough-girl personality. I used the apron and pot holder pattern from Amy Butler's book "In Stitches".  The apron features pleats, a pocket, and a towel loop.
Amy Butler Apron - Back Apron Back
What I did different than the book for the Apron:
  1. I placed the towel loop and the pocket on the left side of the apron because my sister is left handed.
  2. I cut the blue polka dot pocket flap/trim longer because I thought it looked better. I probably added an extra 3/4 inch.
  3. I cut the pocket out of pink fabric instead of the same fabric as the main apron panel.
  4. I don't know if this is necessarily different from the pattern, but I used color matched thread on the project. I even sewed the pocket to the apron using teal thread on the polka dot top half, and pink thread on the pink part of the pocket.
What I'd do different next time:
  1. I'd make the top trim of the fabric longer again. I liked the look.
  2. I'd interface the waistband.
  3. I might cut the point into apron ties (cut the ends at an angle) and sew them up. The pattern actually has you make square ends and then, after you've sewn them up and turned them right side, has you fold them into a point and slip-stitch. It's very odd. (However, I cheated and used steam-a-seam two sided seam tape to attach it instead of slip-stitching...)
Sara's Pot Holders
The pot holders feature a place to put your hands in the back side of the pot holder so you can fold it in half and grab hot pans!  You are seeing the back side of the bottom pot holder.  (Your thumb goes in the bottom "pocket" while the rest of your hand goes in the top "pocket" so you can fold the pot holder in half to grab things with.)
What I did different than the book for the Pot Holders:
  1. I used special "batting" called Insul-Bright that is made for pot holders. It has something in it that "reflects the heat back to the source" and "consists of hollow, polyester fibers needlepunched through Mylar". You can buy it in the interfacing section at Jo-Anns, or order it from their web site pre-packaged. I'm sure you can find it at other shops as well. I used two layers in the main square pot holder section and one layer in the hand flaps on the back. Also, this product says it can go in the washer and dryer.
  2. Since I stuffed my pot holders with insul-bright, they were a little thicker than the pattern expected. When I stitched the bias binding to the back side, I needed to do less than the 1/2" seam allowance so that it would fold over with enough on the front side.
  3. I used the dual-feed foot (also called a walking foot) on my machine to quilt the pot holders as well as sew the bias on. I LOVE THAT FOOT. It made such a big difference in how nice they turned out. If you have one of these feet, you really should use it. For those who don't know what it is, it's a special foot that feeds on the top while your feed dogs move the bottom. It's good for thick fabrics (and stretchy ones) as it helps the top layer and bottom layer move through the machine at the same pace.
  4. My dual-feed foot (as well as some machine's standard foot) comes with seam guides. This was awesome as I did not have to do the masking tape method to quilt the diagonal lines evenly apart. Here is a photo of what I'm talking about. I had to draw a chalk line for the very first row, and then I could use the guide for all the rest.

Using Dual Feed Foot w/ Guide
Dual feed foot with guide attachment. Place the guide on the previous line of stitching to quilt evenly spaced rows.